I picked up some wooden letters earlier this year with Christmas characters on them with an idea of doing something for the grandkids. I have been playing today to see what I can come up with and have so far managed to make a tree/wall hanger.
I just used a strip of card and covered it with green felt, then stuck the letters on and a bit of ribbon at the top to hang it with. It's not a great pic sorry but you can get the general impression lol. Now just a few more to make :)
Thanks
J
xx
Shabby Blogs
Friday 30 November 2012
Thursday 29 November 2012
White Christmas
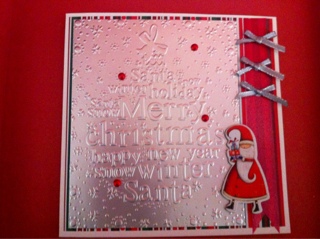
I've seen lots of cards made from all white and think how nice they look so I thought I would have a go. I couldn't believe how difficult it is to keep to the one colour and it not look boring and bland!
I started with the embossed background and matted this on to white linen card. Then I added the Spellbinders majestic elements fancy circle and a frame from another Spellbinders die set the lacy circles. I cut the snowflakes from white glitter card, again using a Spellbinders die, this time the 2012 Snowflakes.
I had some white pleated ribbon in my stash that I'd picked up at the NEC earlier this year and I thought it went really well. The hardest part was putting a sentiment on. It would have been so easy to do a coloured one! but I persevered and eventually found a scrap of card that is a little off white, I stamped it with a white ink and embossed it with white embossing powder. You can see this better in the close up below.
Thanks
J
xx
I started with the embossed background and matted this on to white linen card. Then I added the Spellbinders majestic elements fancy circle and a frame from another Spellbinders die set the lacy circles. I cut the snowflakes from white glitter card, again using a Spellbinders die, this time the 2012 Snowflakes.
I had some white pleated ribbon in my stash that I'd picked up at the NEC earlier this year and I thought it went really well. The hardest part was putting a sentiment on. It would have been so easy to do a coloured one! but I persevered and eventually found a scrap of card that is a little off white, I stamped it with a white ink and embossed it with white embossing powder. You can see this better in the close up below.
Finally I mounted it all on to a 6x6 white card blank, I am quite pleased with the end result though :) What do you think?
Thanks
J
xx
Wednesday 28 November 2012
Tag
I've been playing this evening trying to come up with something vintage for a challenge on ink on my fingers - http://pinkleart.blogspot.co.uk/?m=1
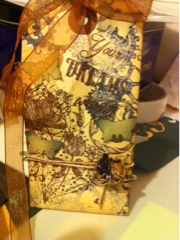
I eventually decided on a tag which I'm quite happy with. What do you think?
I eventually decided on a tag which I'm quite happy with. What do you think?
Happy Birthday
This is a birthday card that I made for a friend of my mum's. She wanted something girly with lots of flowers.
I coloured the little girl with Promarkers and then matted it on to lilac card. An off cut of pink card and some pretty paper mounted on to a 6x6 card blank made the base. Then I looked through all my bits and pieces for little flowers that I could layer up. Some of them are punched from papers and some are the fabric ones that you can buy ready made from craft shops etc. I added a few little brads to the middles of some of them for a bit of texture. A bit of lace, a couple of felt swirls and a ready made sentiment finished it off.
A really girly card, what do you think?
Thanks
J
xx
Tuesday 27 November 2012
Birthday card
This is a birthday card I made earlier this year. It's just a couple of different papers mounted on to an A5 card blank with some lace across the middle. I then drew the number 50 lightly in pencil and used various buttons to form the numbers. I stuck them on with glossy accents and then trimmed the panels with silver peel offs. A really pretty card I think, what about you.
Thanks
J
Xx
Thanks
J
Xx
Monday 26 November 2012
Birthday party, pressies and cards...
I've had my grandsons to visit this weekend so there hasn't been a lot of time for anything crafty! but we've had a lovely time. It's the little ones birthday next week so he had an early birthday party at nanny's on Saturday and presents from his 'Sheffield' family lol.
I am pleased to report that all presents went down really well and he is absolutely in love with his new robot, so thank you to everyone.
These are a couple of the cards I made for him.
Nothing complicated but that's how we like them lol. What do you think?
Thanks
J
xx
I am pleased to report that all presents went down really well and he is absolutely in love with his new robot, so thank you to everyone.
These are a couple of the cards I made for him.
Nothing complicated but that's how we like them lol. What do you think?
Thanks
J
xx
Sunday 25 November 2012
Fluffy Stuff!
When we went to the Ross Papercraft Show last week at the Don Valley Stadium I picked up something called Fluffy Stuff. I've never seen this before and thought it would be good for adding snow and trims to cards.
I love it....
I love it....
I downloaded the Santa and his Reindeer scene from the Silhouette website and cut it out on my Cameo using some of the Happy Days paper by DoCrafts. I had this idea about wrapping it around a card and I think it looks OK on the craft card, I couldn't resist the red nose for Rudolf lol. But then I remembered the Fluffy Stuff and it totally transforms the card.
All you need is a few dabs here and there, then go over it with a heat gun and it fluffs up and looks just like tiny cotton wool balls!
If you haven't come across it before it's made by Woodware and was only a couple of pound for a tube, but you do only need a tiny amount so it will last for ages.
I love it, what do you think?
Thanks
J
xx
Saturday 24 November 2012
A fourth birthday
My great nephew is 4 next weekend so I've made a few cards which I will post through the week.
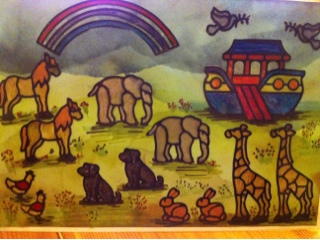
I'm starting with my favourite! These are peel offs stuck to acetate and coloured in. I then used paint inks and pro markers to make a stormy background for them to sit on.
I used 3d clear gloss on the arks windows but it doesn't show up too well in the pictures.
This took a few days to do but I'm really happy with the result. Hope Bailey is too.
A litle gift ...
for mum. She's been a bit under the weather this week so I thought I'd have a go at some more jewellery as a little pressie to cheer her up.
The brooch was a little fiddly sewing all the little beads on to a felt backing but I don't think it turned out too badly. Hopefully mum will like them. What do you think?
Thanks
J
xx
Friday 23 November 2012
Silhouette tree
Good morning,
I was having a look on the Silhouette website yesterday and downloaded their free shape of the week. A 3D Christmas tree.
I love playing with my Silhouette Cameo so thought I would have a go at making this. It's a bit fiddly to fold and stick together (as you can see from the lean, lol) but it is quite cute.
Don't know what I will do with it now, it will probably stay sat on my shelf in the study until after Christmas, but it was fun to play for a bit.
Thanks
Jen
xx
Thursday 22 November 2012
A really quick card today...
Hello all,
This is a really quick card to make. The topper is a download from the Craftsuprint website.
I just really liked the image. All I did was print it on to glossy photo paper, then matted it on to some green card and fixed them to a red A5 card blank. A little bit of gingham ribbon and a couple of hearts was all the decoration it needed. What do you think?
Thanks
J
xx
Wednesday 21 November 2012
A Christmas cutie...
I really like this card, I think It's one of my favourites so far of my Christmas cards. Simple but cute too. What do you think?
It's a 7x5 card blank with a pearl white card panel embossed in a harlequin pattern. A bit of glitter card for the snow and then 2 reindeer and a fancy cross cut on my Silhouette. A ready made sentiment and a few pearls finished it off. But I couldn't resist the little red nose on the baby deer!
Thanks
J
xx
Tuesday 20 November 2012
Being new to blogland....
I'm not sure what tone to take with my writing or what to share. For that reason my posts have been quite dull but I don't know how to make them more interesting. Suggestions on a postcard lol x
Anyway here's a couple more cards done with embossing folders. Hope you like them.
Anyway here's a couple more cards done with embossing folders. Hope you like them.
A nautical themed Happy Birthday...
I thought I'd have a go at some paper weaving for this one. It can be a bit fiddly, especially if your all fingers and thumbs like me, put it does look good when its finished. I cut these two papers in to 2cm strips and wove them together on a plain white panel. Once it was finished I trimmed it all down to sit on the 6x6 card blank.
I didn't really know what to put on top as didn't want to distract from the design, but I came across these simple paper pieces ( I think they came free in a magazine at some point!)in my stash and thought a few would be OK and give it a nautical theme. I fixed them with foam tape to raise them a little. I added the bunting from the same paper pack and then just trimmed it all with some silver border peel offs.
What do you think?
Thanks
J
xx
Monday 19 November 2012
Sequin time...
This is a card I made earlier this year for one of my grandsons. It's very simple.
I printed a large number 6 on the PC and then decorated it with different coloured sequins. I added some peel offs and mounted it all on an A5 blue card blank. A really simple idea but can be adapted for lots of occasions. I've also done something similar but with buttons, they look really effective too.
Thanks
J
xx
Sunday 18 November 2012
Steam punk
I love the steam punk/vintage style cards I've seen in a lot of places but never tried it - until now ;)
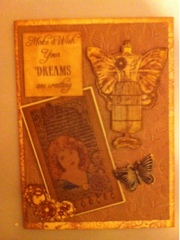
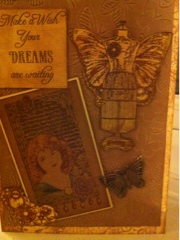
This is a cream card blank stamped with a clock face, next layer is kraft card embossed with butterflies. I've then stamped the dress form, cogs and lady and cut them out. All the pieces have been inked with brushed corduroy distress ink. Sentiment stamped with cocoa brown archival and finished with a metal butterfly.
The photos are a bit dark but hope you get the idea. I enjoyed doing this so hope you like it.
Purchases
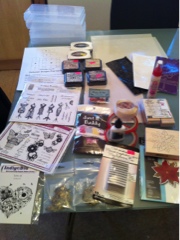
Just got home from the Ross paper craft event at Don Valley Stadium. Spent far too much (as usual) but now have lots of new toys to play with.
Here's what I bought!
Here's what I bought!
Photos
As promised here are my 2 recent Tina Higgins cards plus a very quick one done late last night. Hope you like them x
Getting my craft on
I've had my ear bent about not posting so thought I ought to show you what I've been up to this week. Unfortunately my smart phone ain't as clever as it thinks......... I can't get my recent photos to upload - gggrrrrrr! You'll have to take my word for it about how they look lol.
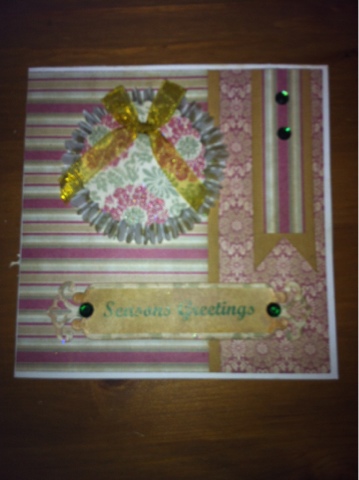
Anyway I've been playing with my tonic dies and punches and done a couple of cards. This first one has a wreath made from vellum and paper and the second has a couple of banners with a large layered block, all done in Tina Higgins' Silent Night collection. It's very vintagey in traditional greens and dark red. I'll try to put the pictures on tomorrow.
What I do have is pictures of the first scarf I've made. I'm going to make a few as Christmas presents.
This is a close up of how fluffy the wool is.
Off to the Ross paper craft show at Don Valley in the morning so best get some sleep. Night all zzzzzzzzzzzz
Another Christmas tree card lol ...
Good morning,
A little bit different card today, more of an experiment really ! But again a Christmas tree, I'm starting to see a theme here lol.
Apologies for the rubbish pic it was very late when I took it and the light was awful. The next one is a bit better.
I used a grey pearlised gate fold card blank for this one. I stamped a border top and bottom using a white ink pad and then embossed with a white embossing powder. I used a piece of scrap border to go across the middle of the card and added a piece of black and white gingham check ribbon in the centre. I topped the card with a simple Christmas tree shape which I decorated with crystal gems and a bow to match the ribbon. (If I do it again I would use self adhesive gems!, these ones I stuck on with Glossy Accents - but it's far too fiddly for me.) Finally I stamped the Happy Christmas greeting with the white ink pad and embossed with the same embossing powder.
I really like the card but I don't think I could do too many this fiddly!
Thanks
J
xx
Saturday 17 November 2012
A really quick card today...
This is a really quick and simple card to make, great for if you need to make a lot of cards quickly.
It's just a topper from the Tulip range matted on to pink glitter card, then layered on to a Christmas paper and all mounted on an A5 pink scalloped edge card blank. A simple ready made sentiment and an elastic bead string finished it off.
Nothing fancy but still a cute card.
Thanks
J
xx
Friday 16 November 2012
Barbie cake...
This was the princess barbie cake I made for my granddaughters 3rd birthday last year.
The ones in the shops are really small and she wanted a bigger one so I did my best. It didn't turn out too badly. I bought a barbie doll and then stripped the clothes of and wrapped the body in cling film to protect it. I used a pudding basin for the skirt of the cake, this one was chocolate, as requested by Miss Lily lol.
When the cake was ready I turned it upside down and then used plain white fondant icing to make the skirt. I let the fondant crease at the bottom to make the folds of the skirt. I then used an apple corer to take out the centre of the cake and put the clingfilm wrapped doll inside. I wrapped the upper body of the doll in icing and then tied a ribbon around the waist.
Thanks
J
xx
Thursday 15 November 2012
Spoilt - but not a happy bunny :(
I have been very spoilt by my hubby and received an early birthday pressie today. He bought me the new eBosser. I've wanted one since I first saw them a few months ago, and I must admit the hints I have been giving him have not been very subtle!
Well it arrived today, I couldn't wait, got it out set it up ran through the free embossing folder that you get with it and it turned out lovely. So next I put some of my spellbinders dies in the sandwich and set it off, it got 2/3rds of the way through the machine and stopped working! Nothing me or hubby do can shift the sandwich it is jammed tight.
So I look online to see if anyone else is having the same problem and it looks like quite a few people have also had this issue. The solution from Craftwell, the makers of the eBosser is to hit the sandwich of plates with a rubber mallet! They say a few gentle taps should do the trick, well I can tell you gentle taps or full on swings do not move this one.
So now I'm going to get in touch with the online store I bought it from and see if they can help me tomorrow, so fingers crossed.
Thanks for listening to my rant lol.
J
xx
Stamping and colouring today....
Good morning,
Another Christmas card today. This one is a little bit different as it's stamped and coloured.
The stamp is from the Tulip range which I think is lovely. This one came in with the Docrafts Bouffle Christmas bag. I stamped it on to white hammered card using London Fog Memento ink, then coloured with Promarkers and Spectrum Noir pens. I ran in through the die cutter to cut a scalloped edge them matted it on to some Christmasy paper and mounted it on a 6x6 scalloped edge card blank.
I added a piece of ribbon from my stash and some holly leafs and berries. Then finished it off with a ready made sentiment and a bit of sparkly glitter glue on the snow.
What do you think?
Thanks
J
xx
Wednesday 14 November 2012
Another wedding cake...
This is the wedding cake I made for a friend in September. The brief I had was 3 tiers, pink and butterflies. Plus 100 cup cakes.
As I've mentioned before baking isn't my first choice of hobby, I like the baking side but I find the decorating part of it really stressful!
It didn't help that it was the same weekend as my granddaughter's christening so I had rather a lot of baking to do!
But I think it turned out really well, and the bride and groom were thrilled with it so that's all that matters.
The bottom tier was fruit and the other two vanilla cream sponge, and the cupcakes were just plain with vanilla icing. They always go down well lol.
Thanks
J
xx
Tuesday 13 November 2012
A bracelet to match
I managed to get away from the decorating for a bit today and make a bracelet to match the earrings from the other day. What do you think?
I'm quite pleased with it for a first attempt. Now if I can just sneak off again for another hour I could make a necklace to match :)
Thanks
J
xx
Decorating!!!
I haven't been able to do anything crafty for a couple of days now as we are redecorating the lounge and it's taking much longer than anticipated!
It's also took over most of the house and I couldn't even get in to my craft room earlier today:(
Hopefully it will be finished in the next couple of days and some sort of order will return, but I'm going to try and sneak an hour later to have a little play :)
Thanks
J
Xx
It's also took over most of the house and I couldn't even get in to my craft room earlier today:(
Hopefully it will be finished in the next couple of days and some sort of order will return, but I'm going to try and sneak an hour later to have a little play :)
Thanks
J
Xx
Monday 12 November 2012
The First Post
Hi crafters! I'm Jude and as she will point out, Jen's older sister. She introduced me quite well so no need to bore you further with the tedious details.
As I've been 'volunteered' to help out at very short notice I don't have anything new prepared. My first post is of a card I made last week when I was playing with Jen's new embossing folders. It's quite easy and probably not a lot of people's idea of a Christmas card but I like it's simplicity - hope you do too.
The shot was taken on my phone in a badly lit room so isn't the best quality, which is definitely an advantage - you can't see the ink smudges lol. Ignore the red box - it was all I had to put behind it at the time.
First attempt at jewellery making...
Well I decided to give it a go today after I found out that my sis already had a jewellery making kit that she'd never used! So I raided her stash too and came up with my first pair of earrings. What do you think?
She had some really nice beads so I decided on a greeny/brown pair. I'm quite pleased for a first attempt:) Now I have loads of ideas for others especially since sis was kind enough to let me have all of her beads and broken costume jewellery that I can use to make new things. I love a bit of up cycling lol.
Thanks
J
xx
Sunday 11 November 2012
Another author added!
You may notice that there are now 2 authors to this blog. I have managed to gently persuade my sister Jude to help out and share the blog as she is a crafter too.
Those are the words I used anyway, she said "you had better write a post to let people know how you bullied and strong armed me into sharing the blog with you" Hahaha.
Anyway this is my sis Jude, with her gorgeous grandaughter at her christening earlier this year.
So welcome sis and now get some posts written lol.
Thanks
J
xx
I'm so excited!
My latest crafty (impulse) buy arrived yesterday and I can't wait to start playing.
It's a beginners jewellery making kit (they didn't have an idiots guide lol). Bought from good old Ebay for the bargain price of £12.99
I have all these ideas in my head for little stocking fillers for Christmas, but since I have never even attempted jewellery making before we will have to wait and see if the beads even make it out of the packets lol. They are more likely to end up between the paws of Princess Bibs while she bats them round the room:)
Thanks
J
xx
Subscribe to:
Posts (Atom)
Two Crafty Sisters, Two Crafty Styles, One Crafty Blog!
