Shabby Blogs

Tuesday 31 January 2017

Air mail

Good morning.  Hope you are having a good week.  
I'm finding it hard to believe it is the end of January already!


My card today was made using the Avery Elle set called Fly By.  I thought it would make a perfect masculine card for a work colleague.


I started by very lightly inking through a cloud stencil for the background.  I used Arctic from the Altenew Glacier Caves ink set.


The plane was coloured with Copic markers and cut with the matching die.  I added small foam squares to give dimension on the front of the card, and did the same with the clouds.


I added the sentiment as a banner behind the plane.  I wanted the black and white striped paper but couldn't find any in the stash.  I made this piece with a permanent marker and a ruler.

Hope you like it.  TTFN Jude xx

Monday 30 January 2017

Congratulations Die

Good morning folks, hope you have had a lovely weekend. I was out car hunting on Saturday and fell in love with a car, which will hopefully soon be mine 😊 lol. Then we had a last minute visit from our grandsons on Sunday for a few hours, which was brilliant. So all in all a very good weekend.


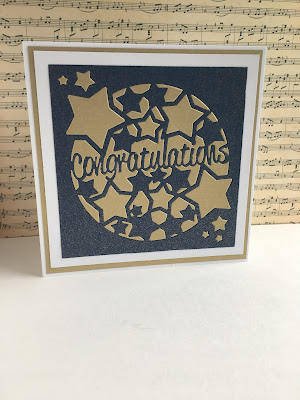
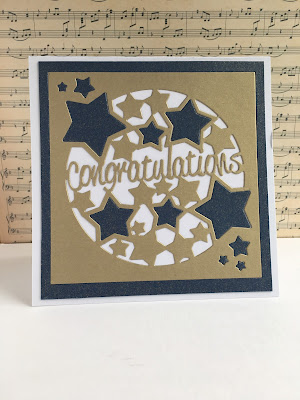
Anyway, today's cards are made using a new Pretty Quick die, from Craftstash UK. This one is simply called Congratulations.


I picked a blue shimmer card and a soft gold card to cut the die twice with. Then I used double sided adhesive sheet on the back of the blue die cut, and was able to piece in all of the cut out bits from the gold die cut.


I used a 6 x 6 square plain card base, and did mats in gold and white card, then added the finished piece on top.


For the second card, I used the same die cut pieces. But this time I didn't fill in all of the cut outs.


I just used a wet glue to piece in the blue stars after I had stuck the gold die cut onto a piece of white card.


Then all I had to do was add a blue mat, and put it on a square card base.


They are both very simple cards, but look a little different just because of the amount of white space left on the second one. These will be great for male birthdays, they can also be made in any colour combination, and other sentiments added for anniversaries etc.


Hope you like them, take care and I'll see you soon.

xxx


Friday 27 January 2017

Blueprints #15

Happy Friday friends.  Can you believe it is February next week?


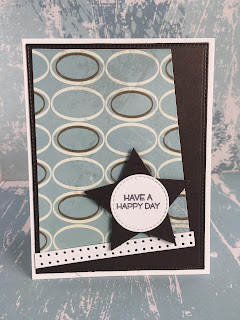
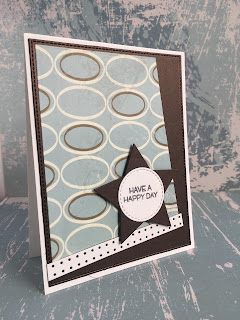
Today I have a masculine card to share with you.  I made this using the MFT Blueprints set #15.


These sets are great for making quick and simple cards.  I used several of the dies from the set  and just layered them together.  You can use as many or as few as you like.  I used five :)


I love blue and brown for male cards so chose a patterned paper from the stash and matched my card stock to it.


The sentiment is from a Simon Says stamp set.  Hope you like it.

TTFN Jude xx

Thursday 26 January 2017

Altenew - Beautiful Day

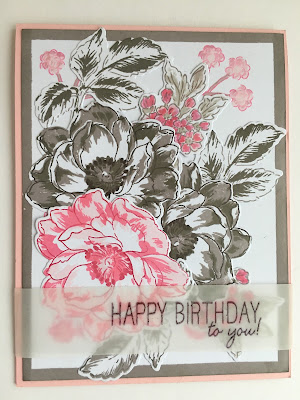
Good morning all. I hope you are having a good week. Today's card is one I made for a lovely friend who celebrated her birthday on Tuesday.


I used the Altenew Beautiful Day stamp and Die set, and stamped them with Altenew Crisp Dye Inks. 


I used Morning Frost, Evening Grey, Moon Rock and Lava Rock, warm grey inks and Blush, Rouge and Crimson from the Red Cosmos set.


For the background I randomly stamped a few of the smaller images from the set and then coloured them with a small paint brush and the same inks.


Then I arranged all of the flowers and leaves on the panel, and raised some with foam pads.


I backed the panel with grey card and put it all on a pink card base. Then to finish it off I stamped a WPlus9 sentiment on to vellum and heat embossed it with Liquid Platinum embossing powder.


Hope you like it, take care and I'll see you soon.

xxx


Wednesday 25 January 2017

New house

Hello again.  Hope you are having a good week.


My card today is a very simple new home card for a work colleague.


I pieced this together by using a stitched square die and a heart die.


I cut the house from patterned paper then took out the heart.  I cut again from brown card and cut diagonally through the square to make a roof.  From the excess I cut the small chimney.


I then recut the heart from red card and added it all to a 3" x 5" card blank.

I finished it off with a simple sentiment.

Hope you like it.  TTFN Jude xx

Tuesday 24 January 2017

Hello - English Rose

Good morning, I hope you are having a good start to the week. I start my new job today, so a little nervous but looking forward to getting back to work, after the uncertainty of the last few weeks.


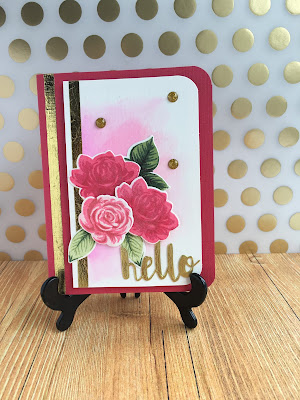
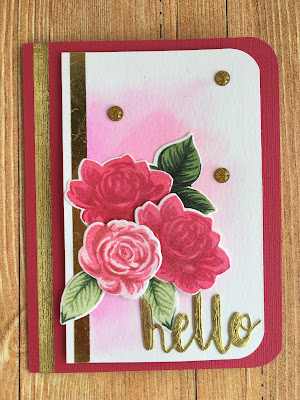
Today's card is one I made when I was having a play with ink colours and water colouring. It's one of those cards that I made just because I wanted too and not because I needed it lol. So I really enjoyed making this one.


I started with some watercolour card and our Zig Clean Colour Markers, and made a very soft watercolour background. Then I added thin score tape down the side and put some gold foil over the top.


The flowers are from the Clearly Besotted English Rose set and are stamped with Blush, Rouge, Crimson and Velvet Altenew Crisp Dye inks. The leaves are stamped with, Frayed Leaf, Forest Glades, Evergreen and Jet Black, Altenew inks.


I arranged them on my watercolour panel and then added another strip of foil to the pink card base. 


Some double sided sticky tape and more foil was perfect to cut the Simon Says Stamp, Painted Hello sentiment with. Then I added a ton of Spectrum Noir Sparkle Pen to the flowers and a few gold glitter enamel dots to finish it off.


Hope you like it, take care and I'll see you soon.

xxx


Monday 23 January 2017

Biker boy

Happy Monday crafty friends.  Hope you had a pleasant and restful weekend. 


My card today is quite masculine given the colours but could easily be made appropriate for a girl biker too.


I used a basket weave embossing folder and used the reverse.  I thought it looked like tread plate.
The bike is an MFT die and the sentiment is part of a Frantic Stamper Precision Die - Happy Birthday Layer Makers set.


I finished the sentiment with silver embossing powder.

Hope you like it.  TTFN Jude xx

Friday 20 January 2017

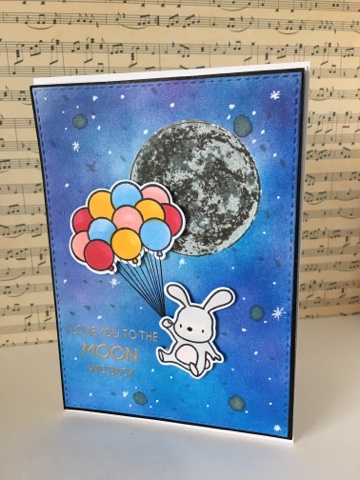
Love you to the moon and back

Good morning folks, I hope you have had a good week. Are you looking forward to a crafty weekend? I know I am lol. 


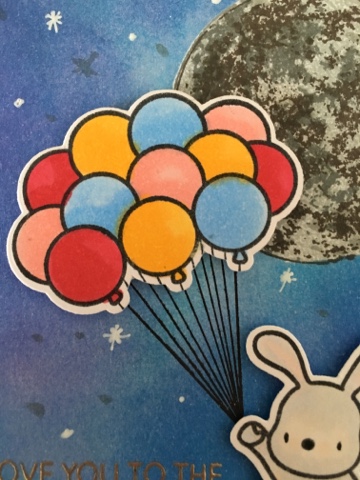
Today's card is another that I made last year but never got blogged. I used the Mama Elephant, Up and Away stamp and die set, along with the Altenew, To the Moon set.


First of all I stamped the moon using Altenew and Memento inks, then I cut a circle mask and used Distress Inks to blend a dark background, around the moon.


I picked one of the sentiments from the Altenew set and stamped it with Versamark ink, and heat embossed it with Liquid Platinum fine detail Embossing Powder. 


Then I added drops of silver shimmer and white paint to the background to give a spacey/shimmery feel.


I stamped the bunny and balloons using Tuxedo Black Memento Ink and then coloured them with Copic Markers and cut them out with their matching dies.


Then after stamping in the balloon strings first, I added the images to the card front, backed it all with black card and added it to a white card base.


Hope you like it, take care and I'll see you soon.

xxx
Wednesday 18 January 2017

Shirt and Tie event

Good morning all, I hope you're week is going well. 


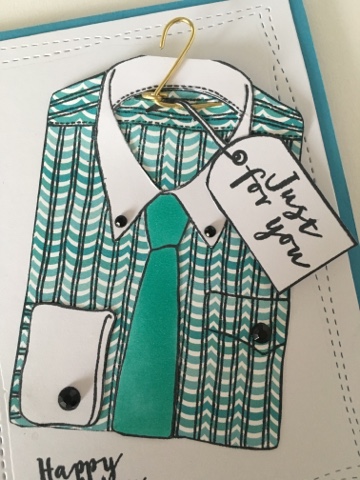
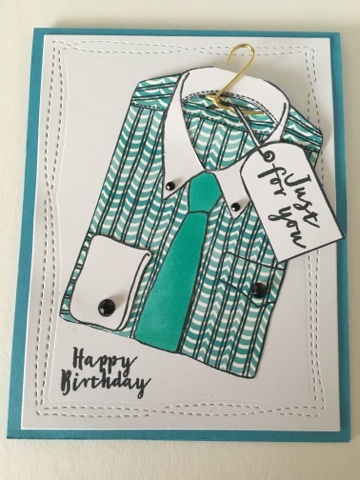
Today's card is one I made for a young man who celebrated his 91st birthday last year! A call went out via Instagram for help in making 91 cards for Pop's birthday. So I offered to send one over to the states to help.


We have had this shirt and tie wooden stamp since I first started crafting, 6 years ago. It was in one of the bundles of goodies I bought on Ebay when I was first getting started. But as with all the wood mounted stamps, it sits in a cupboard and doesn't get used.


But I thought a nice shirt and tie would suit a sprightly 91 year old. So I stamped the image a couple of times. Once on a teal patterned paper and then on plain white card. 


Then I cut them out and put some of the white on top of the patterned paper to give a different collar and cuff and I coloured the tie with a matching Copic Marker.


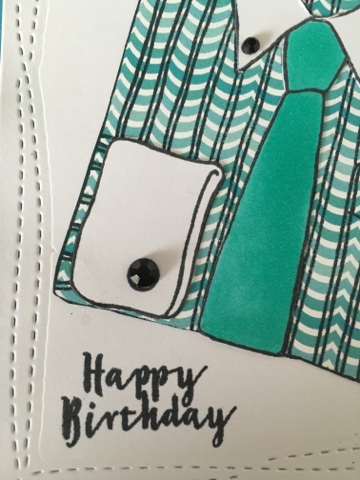
I added a few black gems in a couple of different sizes to the button holes on the pocket, cuff and collar, to make the shirt as smart as possible.  


Then I stamped two sentiments using Jet Black Archival ink. I turned one into a tag and stamped the other on to the card background.


The background was cut with the Avery Elle Wonky Ellements die and I even made a tiny coat hanger from a gold coloured paperclip and made a couple of slits in the back of the shirt to hang it through.


I hope you like it, Pops did. Take care and I'll see you soon.

xxx

Two Crafty Sisters, Two Crafty Styles, One Crafty Blog!