Shabby Blogs

Monday 31 July 2017

1st, 2nd, and 3rd generation stamping

Good morning all, I hope you have had a good weekend. We had a really busy day on Saturday in the garden, we removed a piece of old lawn and replaced it with some artificial grass. Sounds really simple doesn't it. But believe me it was backbreaking, and my brother did most of the work lol. Anyway, it now looks lovely, and Molly approves 😊, so it was definitely worth it. 


Right, today's card was made after watching some Jennifer McGuire video's, and led to me having a go at 2nd and 3rd generation stamping. The technique, (if you haven't tried it already) is to ink up your chosen stamp and stamp the image, then stamp the image again elsewhere on the page a 2nd and even 3rd time without re-inking. 


Depending on the type of ink you use, will depend on the results you get. For this one I used dye inks, so my 3rd stampings are very feint.


I used Memento inks in Teal Zeal and Dandelion, with a couple of different butterfly and bee stamps, and stamped them randomly across the panel.


Then I cut the large butterfly using a Spellbinders die, and inked it with the same colours.


I stamped a greeting using Tuxedo Black Memento ink, and then layered the panel with a yellow mat, before putting it on a polka dot card blank.


Hope you like it, take care and I'll see you soon.

xxx
Friday 28 July 2017

Leaf background

It's Friday at last.  Hope you have a fun weekend planned?


I have made several backgrounds using parts of layered flower sets, but have never tried leaves.  I thought I'd give it a go!


This background uses layer two of the leaf from Altenew's Beautiful Day set.  I repeat stamped on green card using Olive crisp dye ink.


The flower is the same stamp set and uses Parrot, Olive and Moss inks.  The leaves are Bamboo and Parrot.

I used a sentiment from the same set and added a matt, inked with more Olive ink, behind it.


I'm not sure the flower blends in well with the background.  I think I should have done that on green card also (the white changes the colours), but I'm sticking with it.

Hope you like it.  TTFN Jude xx

Thursday 27 July 2017

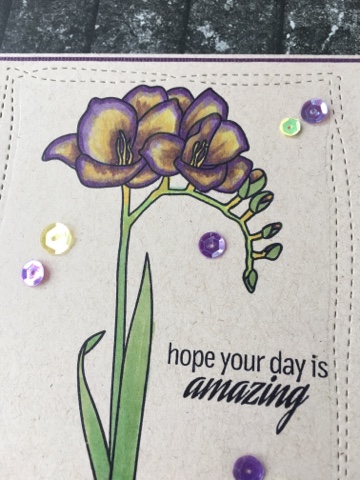
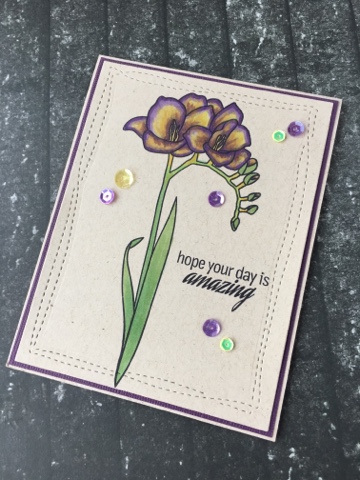
Hope your day is amazing

Good morning all, I hope you are having a good week. I am eventually starting to feel better, so lets hope I can get a bit of time in the craft room this weekend and catch up on some cards.


Today's card is that beautiful Fresh Freesia again from Altenew. This time coloured with Copic markers on Desert Storm Neenah card, from Crafters Companion.


I went with a purple and yellow colour palette this time after looking at some of the colours of freesia images on line. 


I cut the main panel out with an Avery Elle, Wonky Stitched Ellements die and backed it with purple card onto a Kraft card blank.


I stamped the sentiment with Tuxedo Black Memento Ink and then added a handful of yellow and purple sequins to finish it off.


Hope you like it, take care and I'll see you soon.

xxx

Wednesday 26 July 2017

Underwater

Welcome to my watery Wednesday offering.

I made a fabulous background using Distress Oxides and decided it looked like the sea, so needed sea creatures in it.  The colours I used are Faded Jeans, Broken China and Cracked Pistachio.


Funnily enough we don't have any fish stamps (this will be rectified 😉) but a recent magazine freebie included a few ocean elements I could use.


The coral, leaves and starfish were stamped directly on to the inky background, which I sprayed with sparkle shimmer spritz.


I tried the seahorse as a flat element but it didn't stand out enough.  I stamped and coloured it separately, coated it with Spectrum Noir shimmer pen and cut it out by hand, before adding with foam squares.


The sentiment was black heat embossed onto  white card and cut with a stitched rectangle die.

Hope you like it.  TTFN Jude xx

Tuesday 25 July 2017

Teacher Cards and Gifts

Good morning all, I hope you are having a good start to the week. For us last Friday saw the end of the school year, so today's offering is the cards and gifts that I made for mine and Jude's granddaughter's teachers. 


I used some files from my Silhouette software and changed them into fully black shapes, instead of cut-out images. Then I printed them on the laser printer and then coloured them with foil using the Minc machine.


I cut them out with small square or rectangle dies and then added them with foam tape to small handmade card blanks.


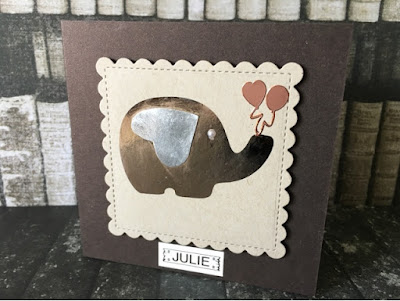
Then I printed personalised labels with the Brother labelmaker and added them to each card.


Luckily I only had seven to make so they didn't take too long lol.


Then I made each of the lady teachers an angel keyring, on one side of the heart it had this quote, and then it was personalised with the teachers name on the other side.


For the male teachers I went with a round wooden keyring, again with a quote on one side and their names on the other side. I used Safmat to print the text on and then cut them to fit the shape with round or heart punches. Then I sealed them all with several coats of lacquer and glitter.


Hope you like them, the teachers did! Take care and I'll see you soon.

xxx

Monday 24 July 2017

Gold Hydrangea


Hello everyone.

Today I am sharing a simple wedding card with you.  I only usually make wedding cards for specific occasions but I decided to try my hand at something different last week, and this is the result.


I used a sentiment from Simon Says Stamp's Congratulations set, and gold embossed it onto cream card.


I then took a different cream card stock, stamped the Jumbo Hydrangea from Stampendous with Versamark ink and finish with more of the bright gold embossing powder.


This worked out really well even on a glossy card stock.

I cut the card to fit either side of the sentiment and added it all to a white card blank.


I think this is also suitable for an engagement.  What do you think?

TTFN Jude xx

Friday 21 July 2017

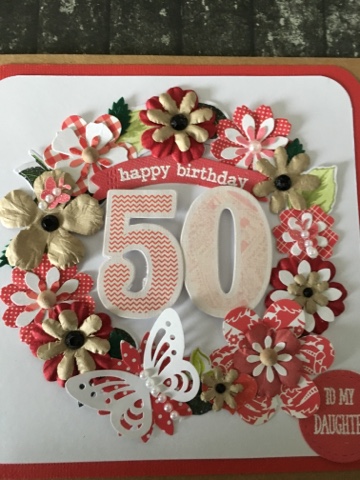
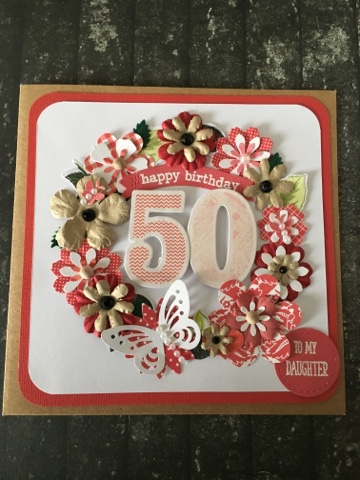
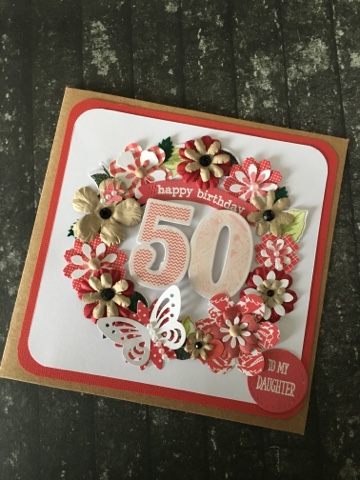
50th Birthday Wreath

Good morning folks and welcome to Friday, hope you are looking forward to the weekend and manage to sneak in some craft time.


Today's card was one I made for mum to send to Jude on her birthday earlier this month.


I actually really enjoyed making this card. I started by cutting a circle frame using a couple of different sizes of stitched circle dies. Then I went through all of the flower stash until I came up with a colour scheme, and then dug out all of the flowers and leaves that were either red, Kraft , green or white.


The numbers are from a Fancy Pants Ephemera set and matched lovely with the colours I had chosen.


Then I sat and had a lovely hour making flowers up and sticking them around the circle frame. I added in some stamped leaves, the odd fabric leaf, and a punched butterfly, until I was happy with the look.


I added it all to a piece of white card, matted it with red and then added it to a 6 x 6 Kraft card blank. Then I added a couple of heat embossed sentiments on little tags and a few gems to finish it off.


Hope you like it, take care and I'll see you next week.

xxx

Thursday 20 July 2017

Floral blues

Welcome back!

Today's card is a very simple but effective background.  I made several like this a while ago and this is my favourite by far.  


This uses the third layer of Altenew's layering stamp set, Beautiful Day and their Sapphire crisp dye ink.

I repeat stamped it randomly over a piece of textured white card, which I layered on to a blue card base.


The happy birthday sentiment is from Avery Elle's City Celebrations.  It is white embossed on to matching card cut with a stitched fishtail banner and added with foam tape.


A stunningly simple creation.  Hope you like it.

TTFN Jude xx

Wednesday 19 July 2017

To a very special daughter

Good morning folks, hope you are having a good week.


Today's card is made using the Dahlia Blossoms set from Altenew.


I used some of the smallest stamps in the set to randomly stamp a background, using the lightest colours from the Rock Collection of Crisp Dye Inks, also from Altenew.


Then in the top right and bottom left corners I stamped the larger Dahlia, using the same inks, but this time also using the darker shades.


I didn't want a lot else on the card, so I wrote some sentiments on the PC, printed them with the Laser printer and then ran them through the Minc machine with a gunmetal foil.


I cut the sentiment up into strips and made them in to little banners, then I ran a silver pen around the edge of them all, and added them to the card using foam tape. A few clear crystals was all it needed to finish it off.


Hope you like it, take care and I'll see you soon.

xxx
Two Crafty Sisters, Two Crafty Styles, One Crafty Blog!